The official OpenStack Liberty Install Guides are a great way to get hands-on experience with installing and configuring OpenStack by hand. This post describes how to install and configure a local VirtualBox environment for performing the step-by-step deployment instructions found in the guide.
Minimum Hardware Requirements
- 2 GHz or faster 64-bit (x64) processor with Intel VTx or AMD-V support
- 5 GB RAM or higher
- 20 GB or more available hard disk space
Download and Install VirtualBox
- Navigate to VirtualBox Downloads.
- Download and install the latest version of VirtualBox for your host operating system.
Configure VirtualBox Networking
Launch the VirtualBox application.
From the VirtualBox menu bar, select Preferences.
From the VirtualBox Preferences menu, select the Network icon.
Ensure the Nat Networks tab is highlighted and select the + icon:
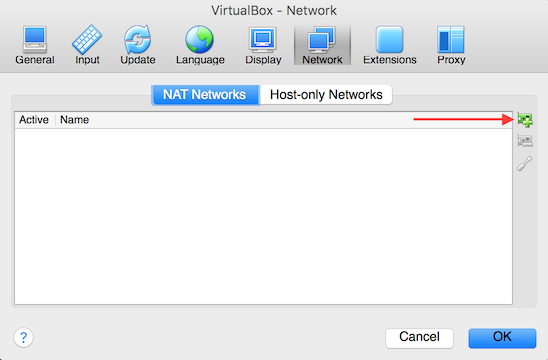
This will automatically create a Nat Network named NatNetwork.
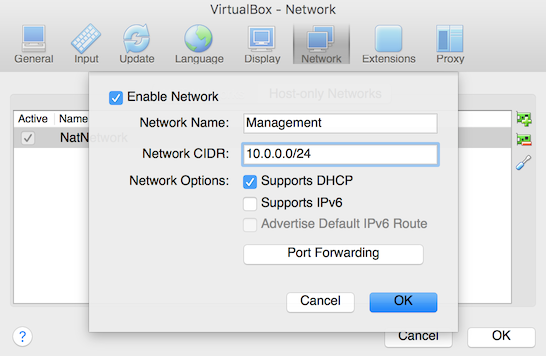
Select the tool icon to modify NatNetwork.
Rename the network to Management and change the Network CIDR to 10.0.0.0/24. Verify the Supports DHCP box is checked:
Note
The gateway for the Management network is 10.0.0.1.
Select Port Forwarding.
Select the + icon on the right to create a new rule. Name: SSH, Protocol: TCP, Host IP: 127.0.0.1, Host Port: 2022, Guest IP: 10.0.0.11, and Guest Port: 22. Select OK to save your changes:

Select the + icon to create another Nat Network. This will automatically create a Nat Network named NatNetwork1.
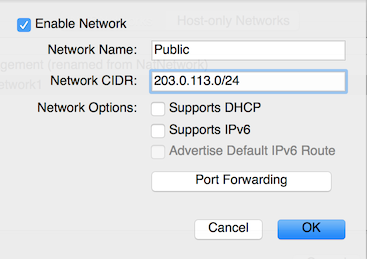
Select the tool icon to modify NatNetwork1.
Rename the network to Public and change the Network CIDR to 203.0.113.0/24. Uncheck the Supports DHCP box. Select OK to save your changes:
Note
The gateway for the Public network is 203.0.113.1.
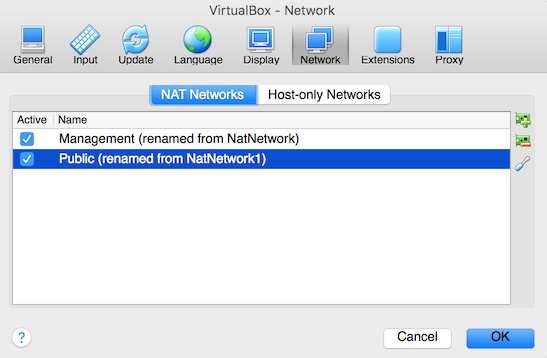
You should now have two VirtualBox Nat Networks: Management and Public. Select OK to save your changes:
Download Operating System ISO
- Navigate to the downloads pages for the operating system to be installed.
- Download ISO.
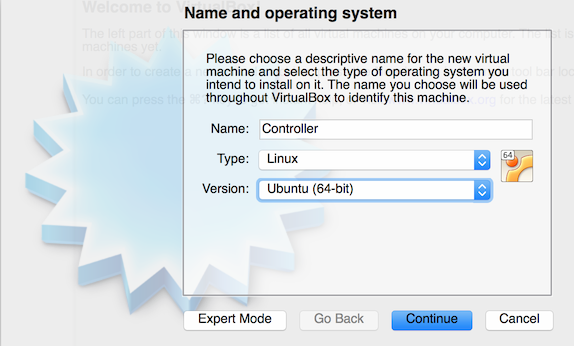
Create the Controller Virtual Machine
From the VirtualBox toolbar, select the New button.
Type Controller in the Name section. The type is Linux. Select the version of Operating System you are installing:
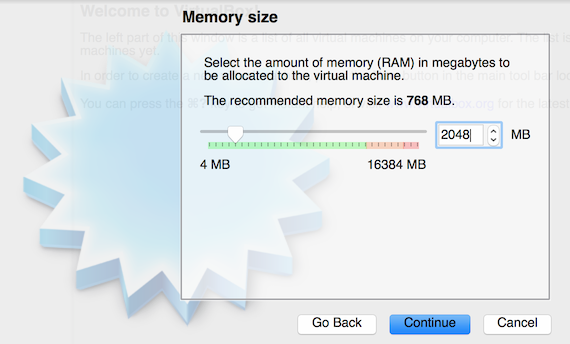
Set the memory allocation to 2048 MB:
Select VDI (VirtualBox Disk Image).
Select Dynamically Allocated and size 5GB:

Modify Controller Virtual Machine Settings
Highlight the controller virtual machine and click the Settings button in the VirtualBox toolbar.
Click the System icon and click on the Acceleration tab. Ensure Paravirtualzation Inteface is Default and Enable VT-x/AMD-V and Enable Nested Paging are checked:

Note
If the Acceleration tab is grayed out, enable Virtualization Technology (Intel VTx or AMD-V) in the host machine's BIOS.
Select the Storage icon. Select the cd-rom icon titled Empty. In the Attributes section on the right, select the cd-rom icon and select Choose Virtual Optical Disk File from the drop down. Select your operating system iso:

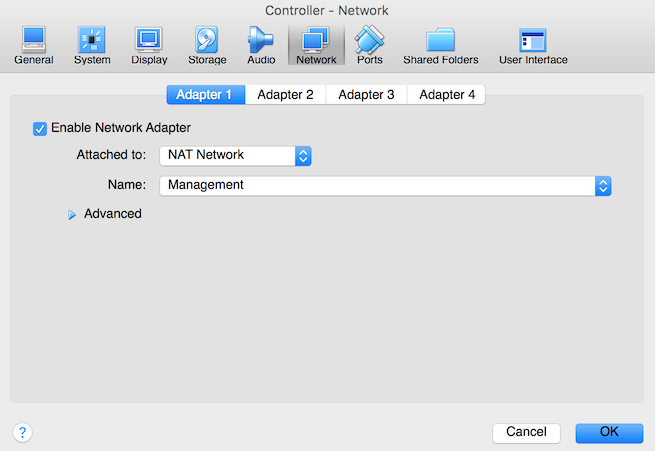
Select the Network icon and click on the Adapter 1 tab. Select Nat Network from the Attached to section. In the Name section, select Management:
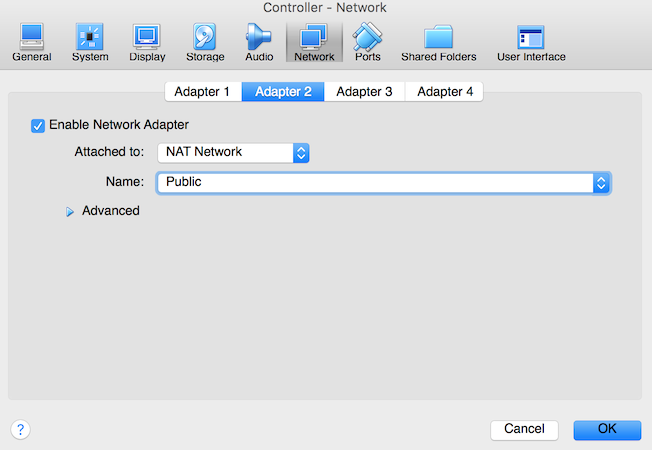
Select the Adapter 2 tab and ensure Enable Network Adapter is checked. Select Nat Network from the Attached to section. In the Name section, select Public. Select OK to save your settings:
Start and Install Controller Virtual Machine
- Highlight the controller virtual machine and select the Start button. The virtual machine will begin to boot.
- Follow the installation instructions for the operating system. Ensure SSH is installed and enabled.
- Refer to Host Networking section of the Install Guide for instructions on configuring the Management and Public interfaces for the controller node.
Create the Compute Virtual Machine
From the VirtualBox toolbar, click the New button.
Type Compute in the Name section. The type is Linux. Select the version of Operating System you are installing:
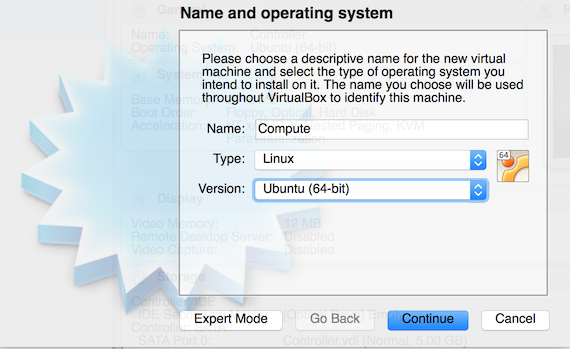
Set the memory allocation to 2048 MB:
Select VDI (VirtualBox Disk Image).
Select Dynamically Allocated and size 10GB:

Modify Compute Virtual Machine Settings
Highlight the controller virtual machine and click the Settings button in the VirtualBox toolbar.
Click the System icon and click on the Acceleration tab. Ensure Paravirtualzation Inteface is Default and Enable VT-x/AMD-V and Enable Nested Paging are checked:

Note
If the Acceleration tab is grayed out, enable Virtualization Technology (Intel VTx or AMD-V) in the host machine's BIOS.
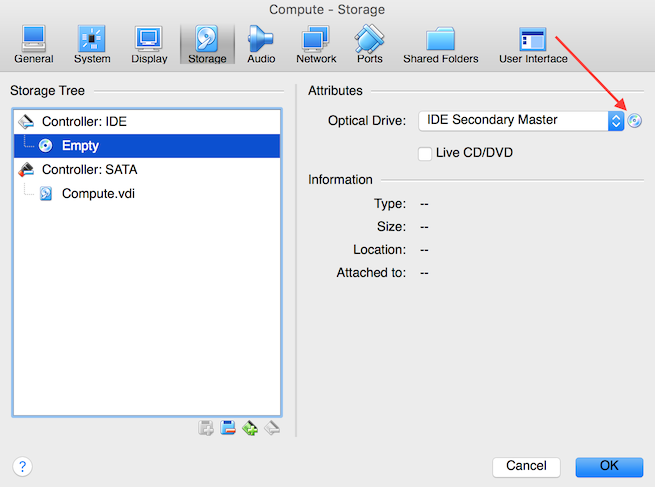
Select the Storage icon. Select the cd-rom icon titled Empty. In the Attributes section on the right, select the cd-rom icon and select Choose Virtual Optical Disk File from the drop down. Select your operating system iso:
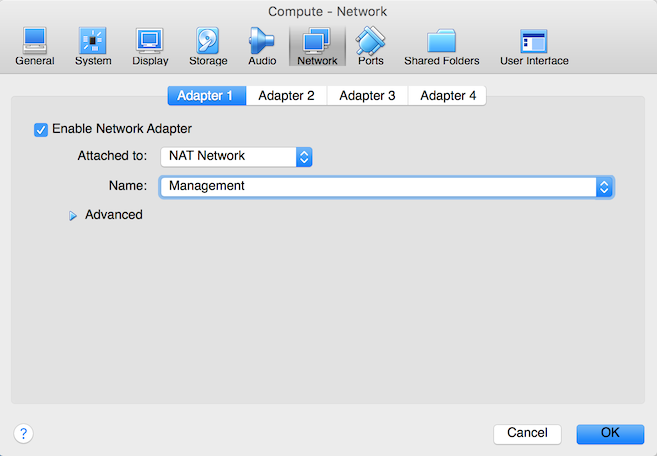
Select the Network icon and click on the Adapter 1 tab. Select Nat Network from the Attached to section. In the Name section, select Management:
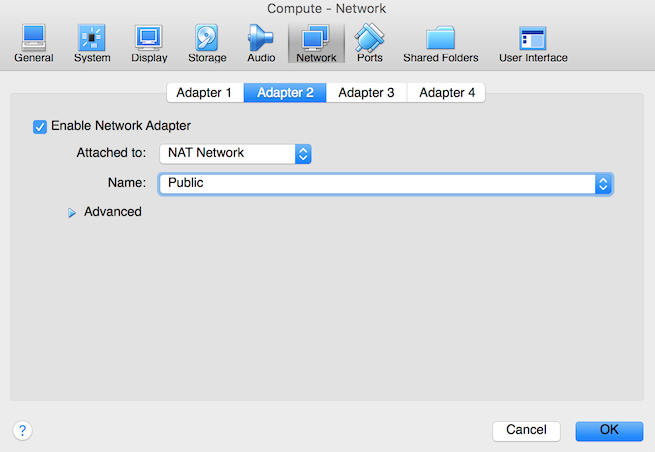
Select the Adapter 2 tab and ensure Enable Network Adapter is checked. Select Nat Network from the Attached to section. In the Name section, select Public. Select OK to save your settings:
Start and Install Compute Virtual Machine
- Highlight the compute virtual machine and select the start button. The virtual machine will begin to boot.
- Follow the installation instructions for your specific operating system.
- Refer to Host Networking section of the Install Guide for instructions on configuring the Management and Public interfaces for the controller node.
Verify Connectivity
Verify SSH connectivity to the controller and compute nodes.
Note
This section assumes the network interfaces and name resolution on controller and compute have been configured per the steps outlined in Host Networking section of the Install Guide.
From terminal software on the host machine, SSH into the controller node:
$ ssh root@127.0.0.1 -p 2022From the controller node, verify ssh connectivity to the compute node:
$ ssh root@compute1
Comments
comments powered by Disqus